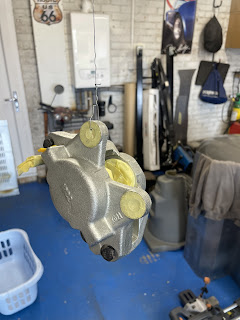
I then reverted back to the original’s after a good wire brush clean, etch prime and paint again. The originals are much more beefy the ones I made as I only had some 18gauge steel as opposed to these that are double bonded 3mm steel so really strong in comparison to mine….. belt and braces.
Not all is in vain with my now redundant brackets as they will come in useful for the bell housing bolts as they can act as a clip point where the brake line passes over the transmission to the servo so I’ve really just solved a problem way further down the line, way before I get to it.
I moved onto the front hubs next and spent some time wire brushing and removing all the texture paint from the back of the hub to give a good machined face surface for the brake rotor to sit against. The rotors fitted perfect to the hubs and were torqued up to, in my opinion, a relatively low 88Nm and now with the rotors on the hubs the whole assembly went back onto the stub axles. I’m not setting all the bearings under load yet as they will be on and off many times again over the next few months during the build so just on finger tight for now.
In went the brake pads that came in the kit, mixed reviews on these over the internet and the social media groups, still they will be fine for my needs and it’s not like brake pads are expensive or hard to replace later on if needed. The offside is significantly tighter than the near side on the pads, and keeping in mind no pressure or fluid is present yet it seems like the offside rotor is tad further offset on the calliper centre line. This could be down to the bearings not seating perfectly until they get some use or possibly just tight from being new. I’ll look into possibly adding a shim between the rotor and hub to bring it back or possibly one to watch after the first few miles on the clock after everything has settled in. These are fixed callipers and not sliding so the rotors should be fairly central in the calliper to avoid uneven pad wear over time.. a little niggle but “should” be easy enough to sort out.
I’m really pleased with how these are looking and will hopefully be pleased with how they perform also. They must be the smallest brakes I’ve ever seen in my life, but should be more than sufficient for my little Spyder. After all they will be doing less of a job then if a Spitfire body was going back on.
Next up I think I need to tackle the steering rack. I have watched some really good videos on you tube on a full refurb which had easily given me the confidence to tackle it myself. I will enjoy the strip down of that and cleaning it all up. I’ll need to order the standard perishable parts but other than that it should be straightforward to do and enjoyable… it’s nice to finally start building and putting stuff together again, very satisfying.


No comments:
Post a Comment