Since I have had the chassis rolling and the body fitted I have never been 100% happy with the width at the back end. I first noticed the potential issues when fitting the adjustable radius arms and my measurements for the brackets was significantly different to what was advised within the build guide. This I can only presume is the difference between using Spitfire running gear against GT6 running gear with a rota flex rear drive shafts. Still more than one way to skin a cat as such. As you can see pictured here the width of the car on standard spitfire running gear and my knock on wire wheels.

Solutions to this issue are not going to be easy or relatively cheap. My options to increase the track is to space the hubs or change the offset/backspacing of the wheels. Changing the backspacing of the wheels will be very very costly due to the specific size of the wheels which would then require a new set unique to my requirements so easily close to £2000…. Which I don’t have. Also I love the little 13” wheels I have and they will technically keep the speedo reading accurate as they have the same rolling circumference as the original Spitfire wheels and it would be easier to find another set of wheels the same size secondhand again should I need to in the future.


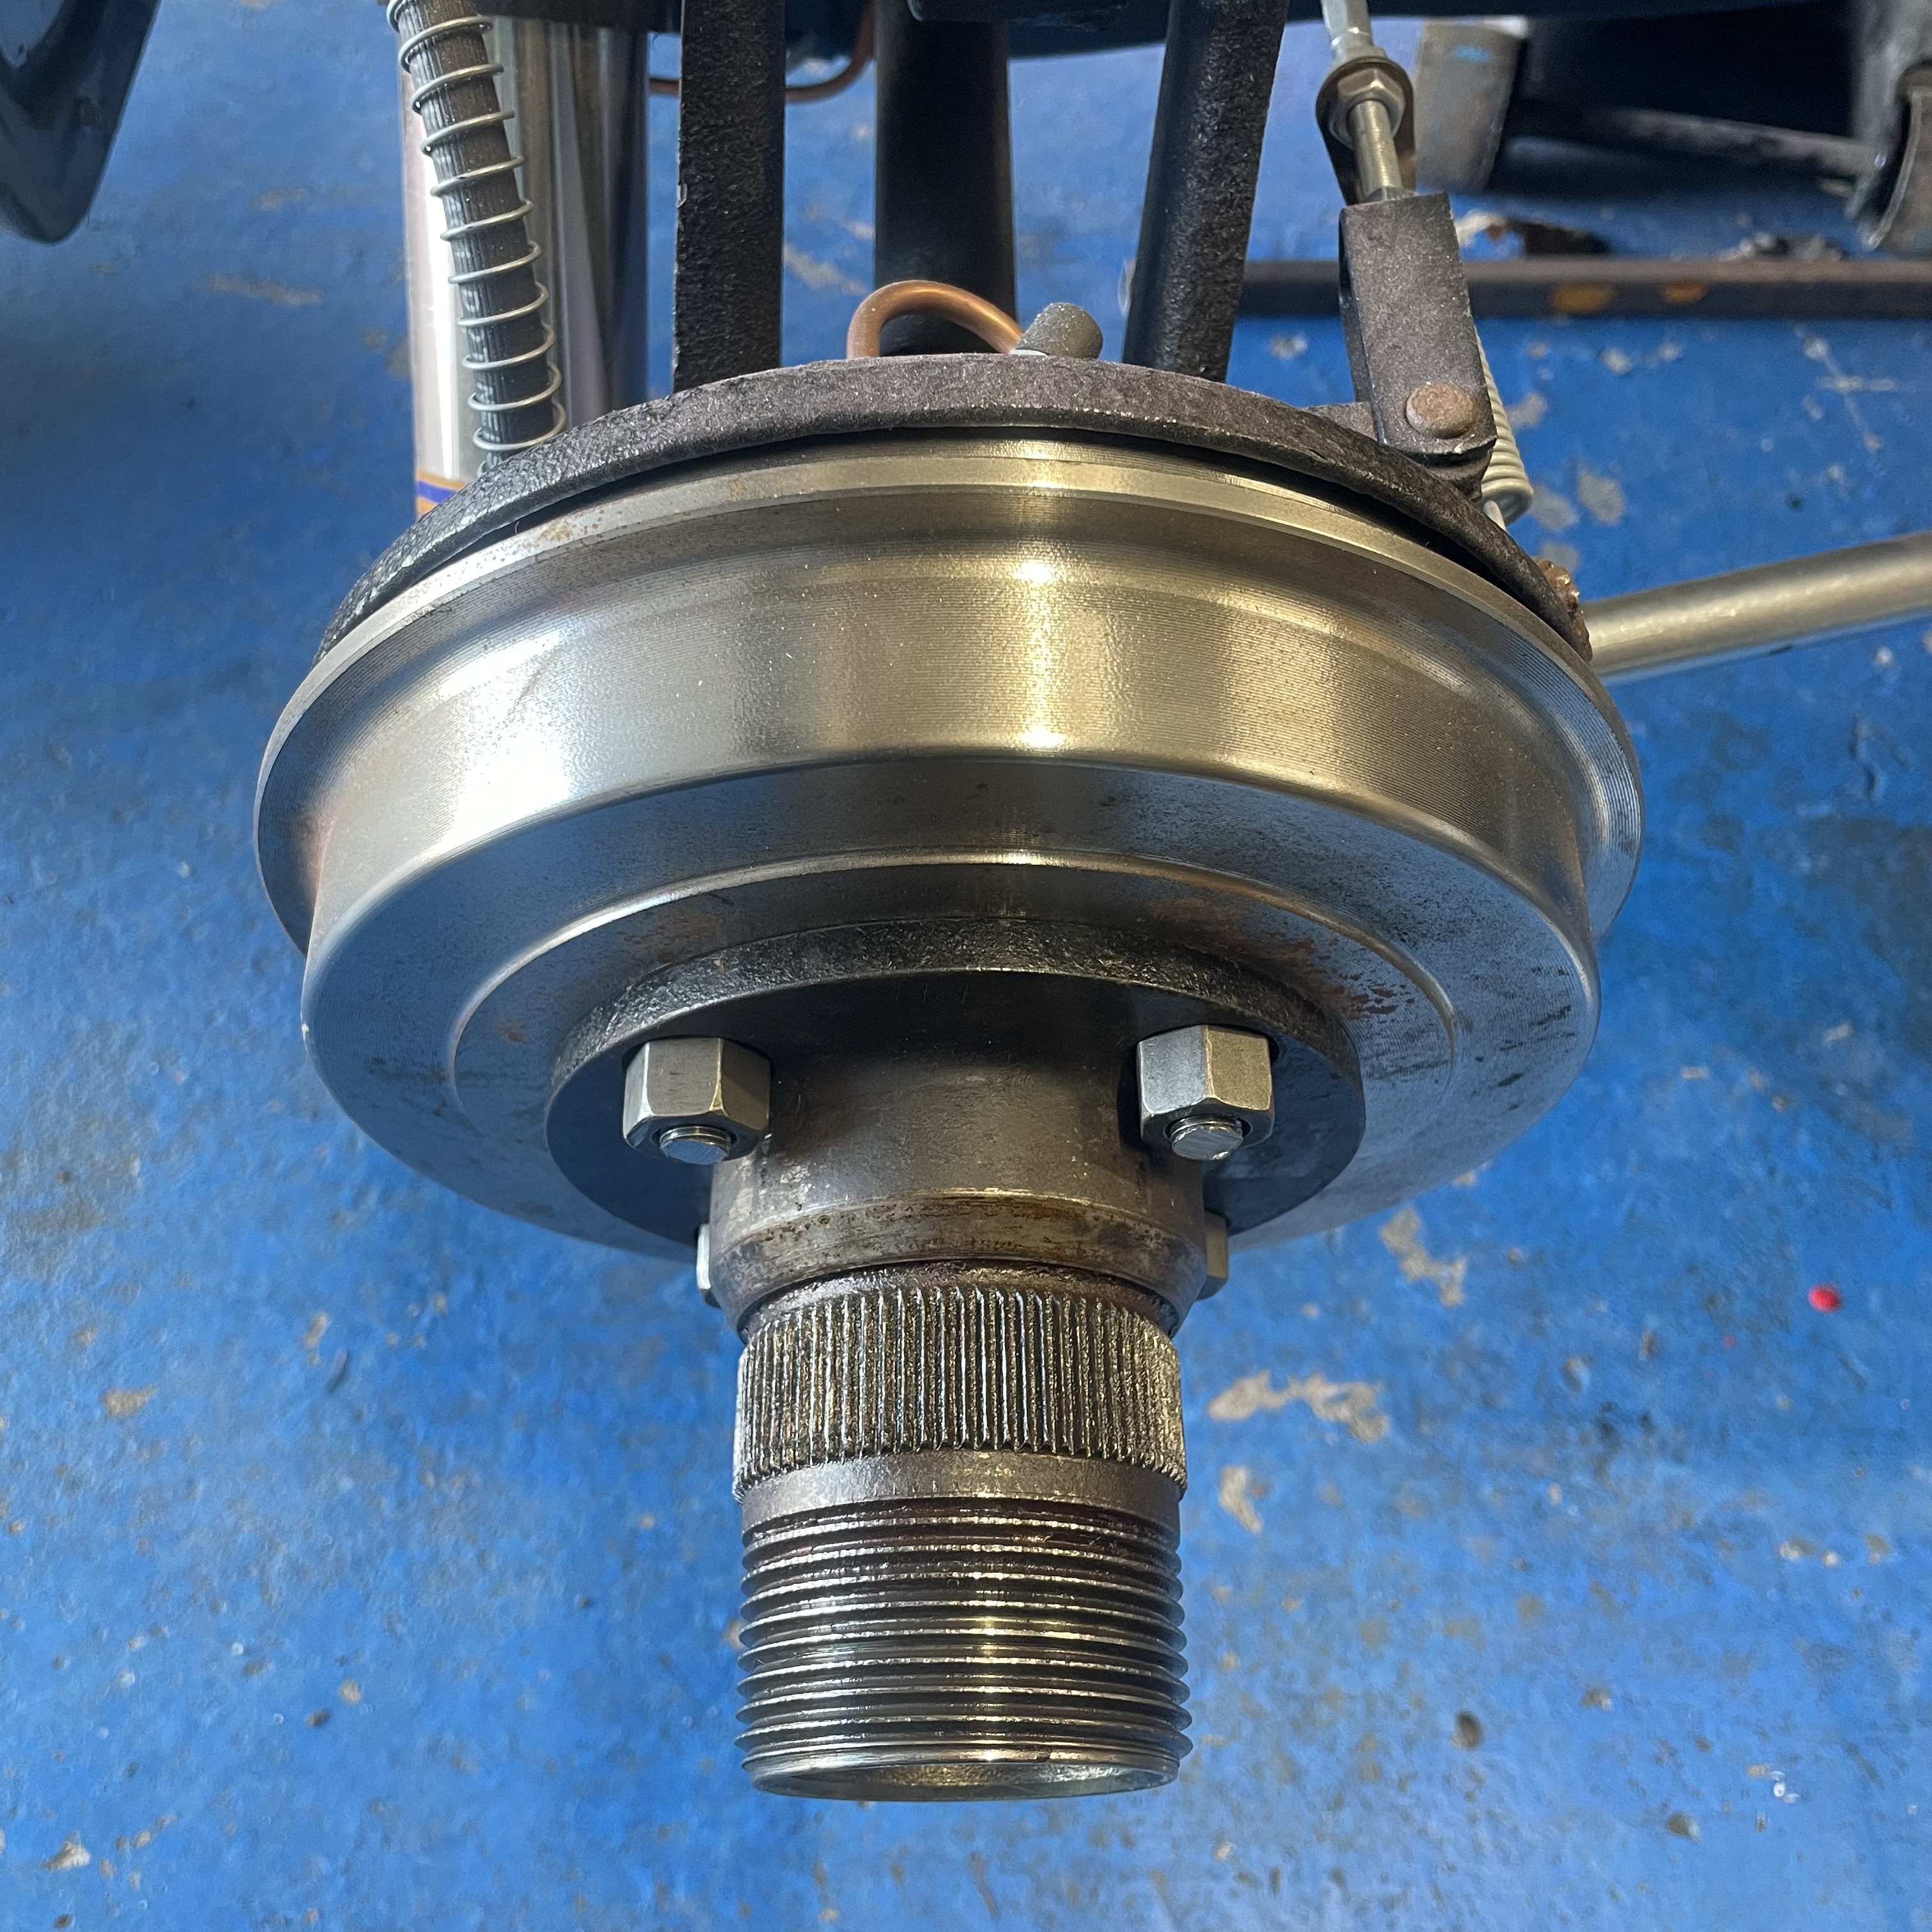
So my chosen option is to space the hubs by a significant amount really… 30mm each side!! Wowsers! I have researched this option in great depth and have seen some really bad examples and issues off the back of bad installations, but with the correct install using the correct components then I’m struggling to see what issues will arise really. Physics is physics after all! So I have specifically ordered hubcentric spacers machined to my 4 stud PCD with upgraded M12 x 1.5 studs as opposed to the original 3/8th on Spitfire. I also now intend to replace the wheel studs in the Spitfire hub to bigger more beefy Freelander M12 x 1.5 studs despite me already replacing these for original replacements earlier in the build. The advantage being I will then be able to torque the spacer to the hub and the knock on adapter to the spacer using around 110Nm as opposed to only 65Nm on the smaller studs. I will need to get some open wheel nuts with a 40degree taper as opposed to the ones in the picture here which are 60degrees, as they nip up ok but aren’t seating 100% against the knock on adapter. Also the bigger studs will be less likely to get stretched by over tightening and thus loosing the tensile strength and potentially a wheel when driving. This genuinely is a fairly common problem with Spitfires and if you look back in my blog to see the pictures of the previously replaced studs you can then see the effect of over torqued nuts!!
So now with the two hubs provisionally fitted you can now see the increase in track width this has given me, and wow it is soo much better than previously. I am much happier with the stance of the car now and I hope I don’t live to regret such a drastic spacer fitted. However a chap I work with has a Ford Ranger (I also own one on standard wheel size) and he has 20” wheels spaced 50mm each side which looks barbaric in my opinion. But he has been using it daily for a good few years now with no issues. Yes it’s a 5 stud pattern as opposed to 4 but as I said previously the correct components and physics is physics which can’t be denied.

With the rear wheels now spaced and set correctly I was able to now make a start on fitting the mud guards. This has been a real pain in the arse from start to finish (and I’m not finished yet) and I’m really out on my own when it comes to fabrication and fitting. The build guide is extremely vague on fitting these, and what little information on the internet from previous builders all state they didn’t “beef” up the fixings enough and have lost mudguard during a drive…. Let’s see if I can nail this first time then!
I started off welding two bits of plate on each side of the rear drum back plate. I was intending to fit the two front guards first however after fitting the rear spacers I am now considering spacing the front wheels also to give me a tad more steering angle. The current setup sees the wheel voiding the body with about 1.5 turns of the wheel and if I was to space the front wheels slightly (about 20mm I think) should see me get a significant further turning pitch before voiding the body with the inside face of the wheel. I will be restricting the rack once all this is concluded so that I can turn lock to lock without fear of causing issues.

With the tabs welded on as my fixing point I have used some 3mm flat bar to create the frame to mount the mud guard. It has been a real pain in the bum if I’m honest and to make a second for the other side keeping the same spacing and symmetry is a tad daunting, which I’m not looking forward too… still onwards. I can’t really go into detail as to how I made this frame, it was just a tedious process of bending, adjusting, trial fitting, jacking up, wheel on, wheel off etc… etc… however the one side is starting to come together. If you see pictured here that I have added some strengthening sections welded down the two uprights and these take out soo much vibration and wobble that was previously present and have massively beefed up the whole structure which I’m very happy with, again to replicate all this for the other side is going to keep me awake at night as I want the arches to both sit evenly and equal each side.


With the arch resting on the frame and some manipulation of the metal here and there I was getting much happier with the fit and spacing of the arch. I had cut some little notches out off the fibreglass to allow for the fitting and I have also sanded and got an even radius of the arche edge all the way round. Some fine tuning will be required when it comes to the paint, but the cut edges are now all acceptable for trial fitting.

I still need to physical fit/bolt the arch to the frame but my intention is to use some long pan head bolts spaced between the arch and the frame using some tick wall rubber hose to act as a slight dampener to help reduce any vibration issues when driving and to give a small amount of flex should the wheel kick up a rock or stone when in use. I’m fairly happy with how this one is fitting now, but again I’m daunted and frustrated to recreate the same for the other side. I will just plod on when I have time and update you all as and when I can. This is progress, but it just doesn’t feel as satisfying to me to get this done.

I have over the past few weeks aged an extra year which has allowed me fit some presents that I was given (under instructions from myself naturally) so on go some mirrors that I have been looking at for a while… not a bad gift for £40 really. The same units as fitted to Aston Martin DB4/5 and some Zagatos also but despite these costing only £40, I know for a fact that some Aston Martin owners are happy to pay more than £100 for these exact units…I think £40 is a fair and acceptable price without paying the dick swinging tax…. And they look great along with actually being fairly practical!! I also have some leather boot straps that match the ones I fitted to the bonnet, but I’ll save fitting those for another day.
That’s it for this update, next one soon I hope, feel free to gift me money so I can buy more bits I need, just message me for my bank details or put cash straight through my letter box.


No comments:
Post a Comment