So after the last update I’d sort of reached a hurdle where as I couldn’t really make any serious progress without ordering the chassis/body package from Mick, which I really don’t have the disposable income available just yet. I have to pay for the “needs” list more than the “want” list and my latest gas and electric bill is purely barbaric which adds onto the strain even further. However I was speaking with another Spyder owner and I had a light bulb moment, as he was talking about his build manual for his car! Why had I not enquired about one before? When building the Cobra the build manual was really helpful to process the build stages and clarify some details in my head prior to actually tackling them. So I got straight in contact with Mick and for the grand total of £10 I had a pdf build manual with in 24hours.
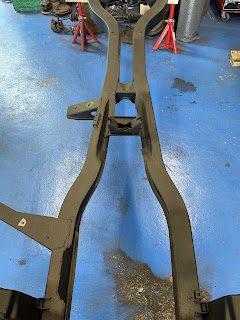
The manual was instantly printed out and laminated and after a quick read it clarified some questions I had in my head in regards to the chassis layout, so already a shrewd investment. With a new list of jobs to do to the chassis I got cracking. First on the job list was to remove the chassis outriggers, rear tow points, bonnet stay bracket, bonnet pivot fixings and two blocks next to the gearbox mounts. Whilst I have already had the chassis blasted and texture finished I was fully aware that I would be cutting bits off and having to repaint the areas that are needed, hence the texture finish paint to help with blending in and keep the chassis looking good also.
Out came the grinder and cutting discs and within a few minutes, off came the block. All these parts getting removed are not chassis structure but support areas for the Spitfire, and so it keeps within the required legal side of things for keeping the car registered correctly, and avoiding another IVA test. Once the block was removed I continued to one of the overriders. The trick to removing these was to grind into the overrider itself just in front of the seam weld, but not enough to go through to the chassis, then with a misuse of tools I took a chisel and peeled up the skin and thwacked it all with a big hammer.
After removal it was easy just to tidy up the area with a flap wheel, making the area all clean and shiny again. I have covered all the exposed bits I’ve done with a black etch primer to protect the exposed bare metal, and so it will be nye on ready to get its final texture top coat, once the new floor pans have been welded on at a later date.
So I moved onto the front overrider next, and according to the build manual these are the prone areas for rot and rust to set in, as moisture can get caught between the chassis and lower skin and slowly corrode the chassis over the years.
The process for removal is the same, grind into the overrider skin to detach from the weld then smash the shit out of it with a hammer. As you can see from the image a light surface rust was present (top and bottom) but nothing of any concern whatsoever. So another tidy up with the flap wheel and cover in etch prime. The new floor pan will be welded onto these sections of chassis as and when I order them, so I’ll be stripping this primer again to weld the bits on…but prevention is better than cure, especially when we’re talking about rust and anything British Leyland!


No comments:
Post a Comment